Push leads from GrowthRobotics to MailChimp instantly

MailChimp is one of the most popular email marketing tools. By Integrating GrowthRobotics with Mailchimp, you can push your leads instantly and reach them faster.

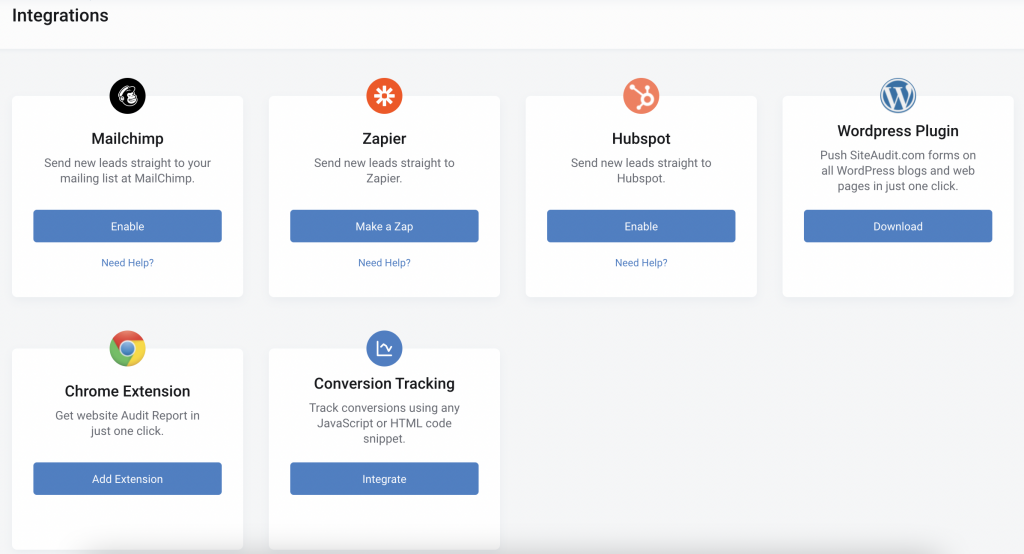
Follow these 3 simple steps to enable GrowthRobotics Integration to Mailchimp.

Step 1:
Login to GrowthRobotics and click on Integrations.
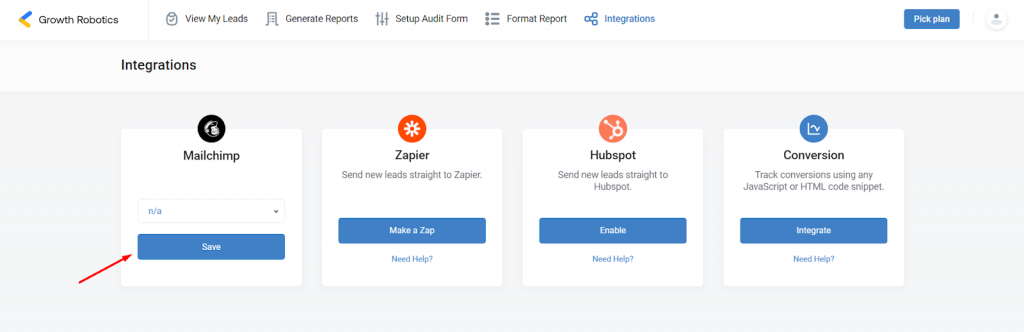


Step 2:
In the MailChimp section, click Enable.
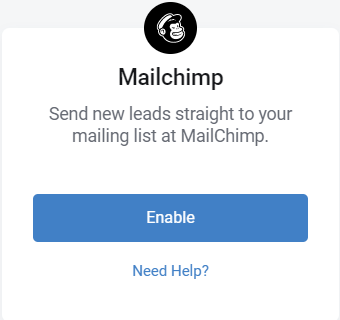


Step 3:
Enter the Username and Password of your MailChimp Account.
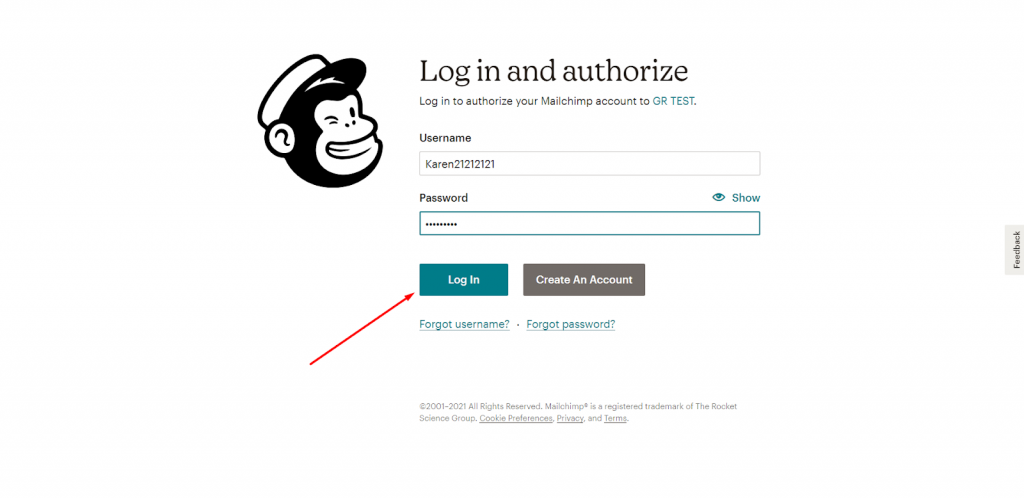

Step 4:
Hit Allow to be able to run a GR Test.
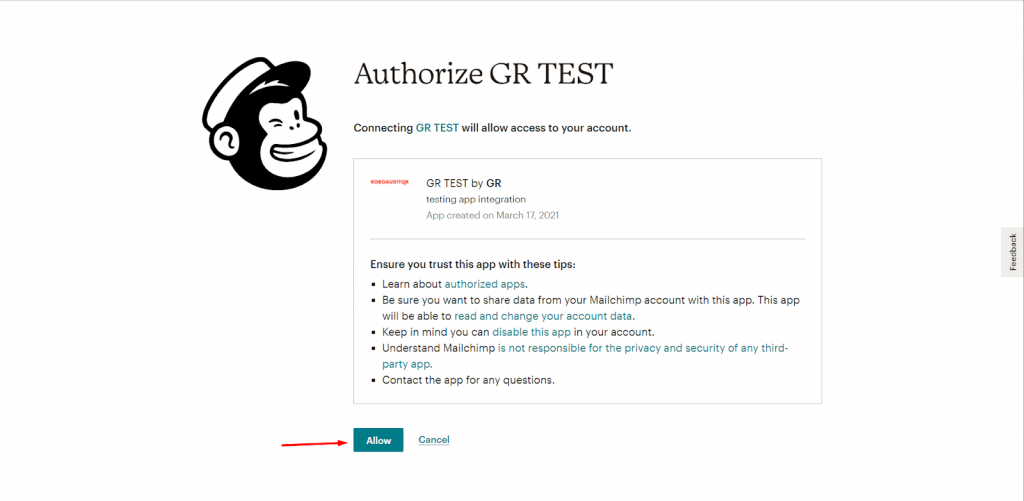


Step 5:
Once you hit Allow in step 4, you will be redirected to the integrations settings page. From here, select your Audience ID of your MailChimp Account.
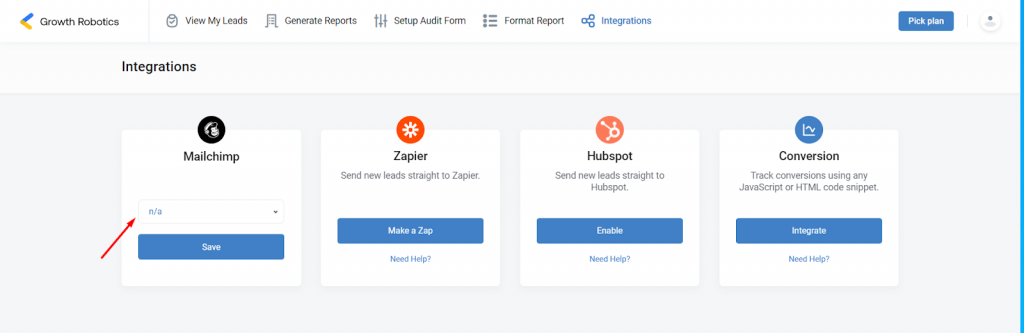

Step 6:
After Selecting your Audience ID click Save.


That’s it! You’re ready to go! Your MailChimp Integration with GrowthRobotics Tool is all set up. 🙂


0

Direct Leads from SiteAuditor to any application using Zapier

We have integrated Zapier into the CRM tools. Using which you can send all the leads created in SiteAuditor to CRM tools effortlessly!

What is Zapier?

Zapier is a tool that is used to connect applications to save time.

Why Zapier in SiteAuditor?

  • To improve your experience when using CRM tools in marketing automation and throughout your lead nurturing process. 
  • To send leads that you generate on your website to CRM tools like HubSpot, Active Campaign, MailChimp, etc.

Log in with your SiteAuditor Account and click on Integrations. Here, you’ll find the “Zapier integration block”. Click on it.


Log in with the email address and password associated with your Zapier account, or click “Sign Up!” to start your free trial of a Premium Zapier account.


Click on this link to access SiteAuditor in your Zapier account.

Scroll down the page and click “Login to Accept Invite” (if you’re not logged in.) Otherwise, click “Accept Invite & Build a Zap.”


Step 1: 
You’ll see a page where you can create a Zap. Click “Make a new Zap.”


Step 2: 
You’ll see a trigger modal. Search for “SiteAuditor” app and click on it


Step 3: 
On the opened page, choose the trigger and click “Continue.”


Step 4: 
Click “Sign in to SiteAuditor.” 


You’ll see the authentication page.

To get your API key just log in to your SiteAuditor account and click on the user profile.

Copy-paste your API key. After that click “Yes, Continue.” 


Step 5: 

Click “Continue”


Step 6: 
Fill in the required information and click the “Continue” button at the bottom of the page.


Step 7: 
Click “Test trigger”


Step 8: 
Click “Skip test”


Step 9: 
Click “Continue”


Step 10:
You’re Done! Choose an app and set up the action.

0